Push-to-Close Latches / Locks
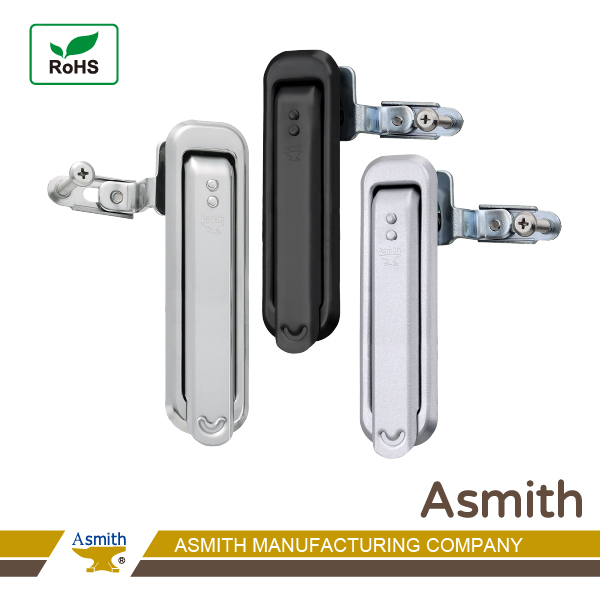
BS(T)-12(2) series
Features
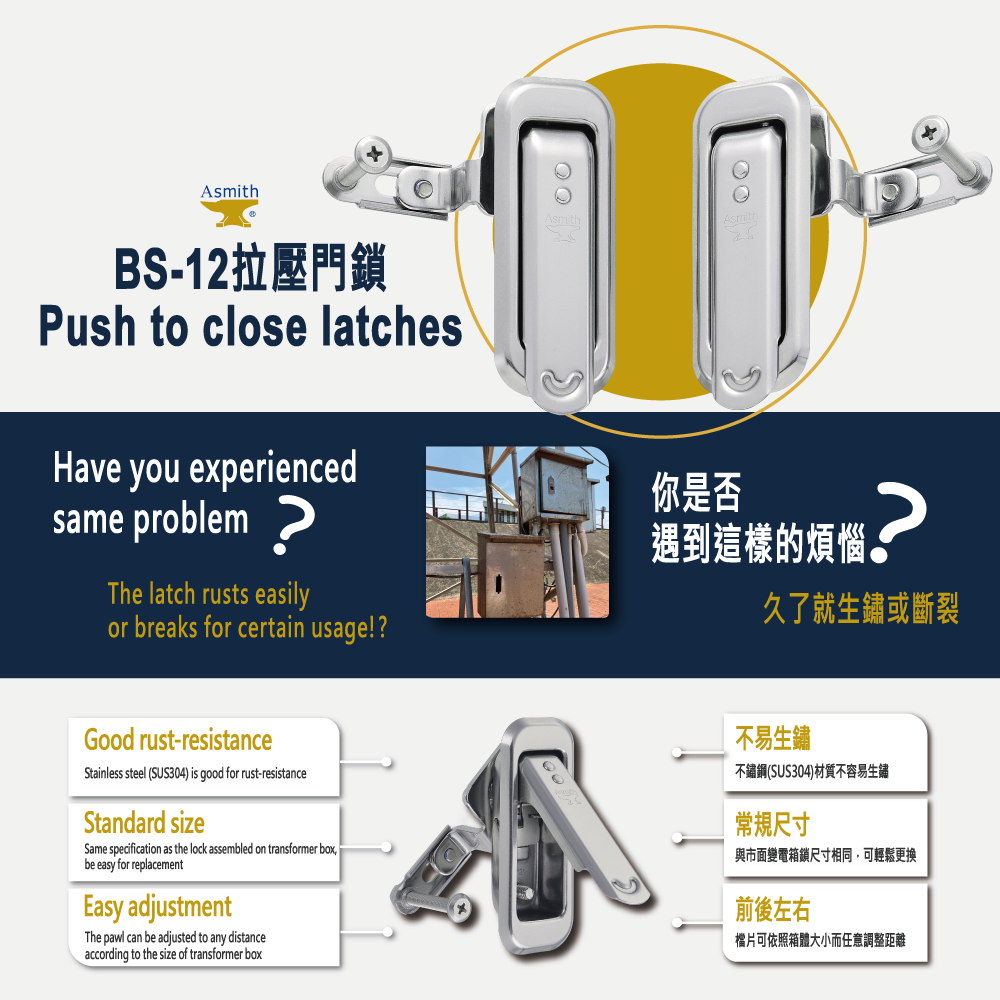
Plane Lock,Push to Open Latch|High-value door latch made with stamped-steel construction. Simply pull or press the door handle lightly to quickly open or close the door lock.
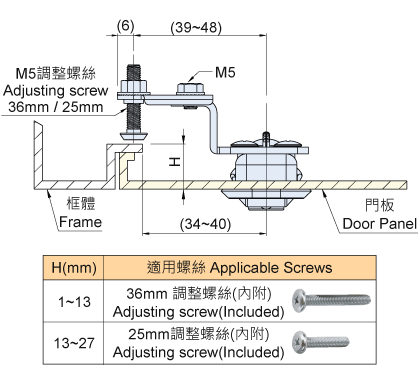
The pawl allows for adjustable and is suitable for different box thicknesses.
BS-122 : SUS304, to reduce rust or breakage issues.
BT-122 : SPCC double-layer surface treatment: zinc plated + baked paint, The product has demonstrated corrosion resistance up to 72 hours in salt spray testing. (The current test duration meets product specification requirements. Further testing hours will be evaluated based on application scenarios and market needs.)
The included truss head screw are suitable for panels up to 5mm thick; use longer screws to accommodate more panel thicknesses.
➤Material-Body: SUS304 stainless steel-Vibration ground, Steel(SPHC)-silver-white, black.
➤Material-Shaft, pawl and mounting bracket: SUS304(stainless steel)-vibration ground, Steel(SPHC)-zinc plated.
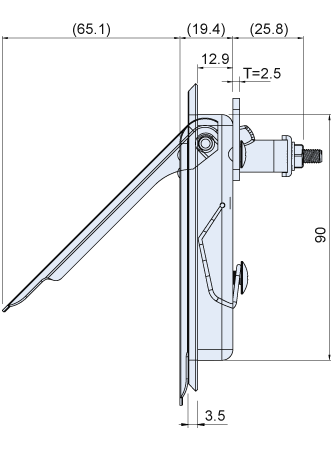
Unit: mm [※1 kgf ≒ 10 N]SPECIFICATIONS
Recommended Series
-12/%E5%90%8C%E7%B3%BB%E5%88%97%E6%8E%A8%E8%96%A6-%E7%9F%AD.png)
Simple Comparison
| Item No. | Style | Length | Width |
|---|---|---|---|
| BS(T)-12(1) Series | Short Type | 89mm | 33mm |
| BS(T)-12(2 Series | Long Type | 118mm | 33mm |
Introduction & Installation Video
BS(T)-12 Quick Installation Video
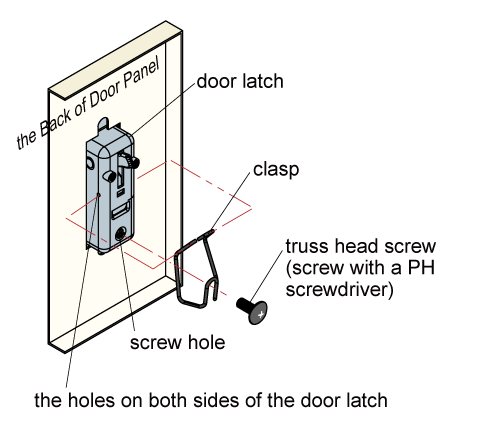
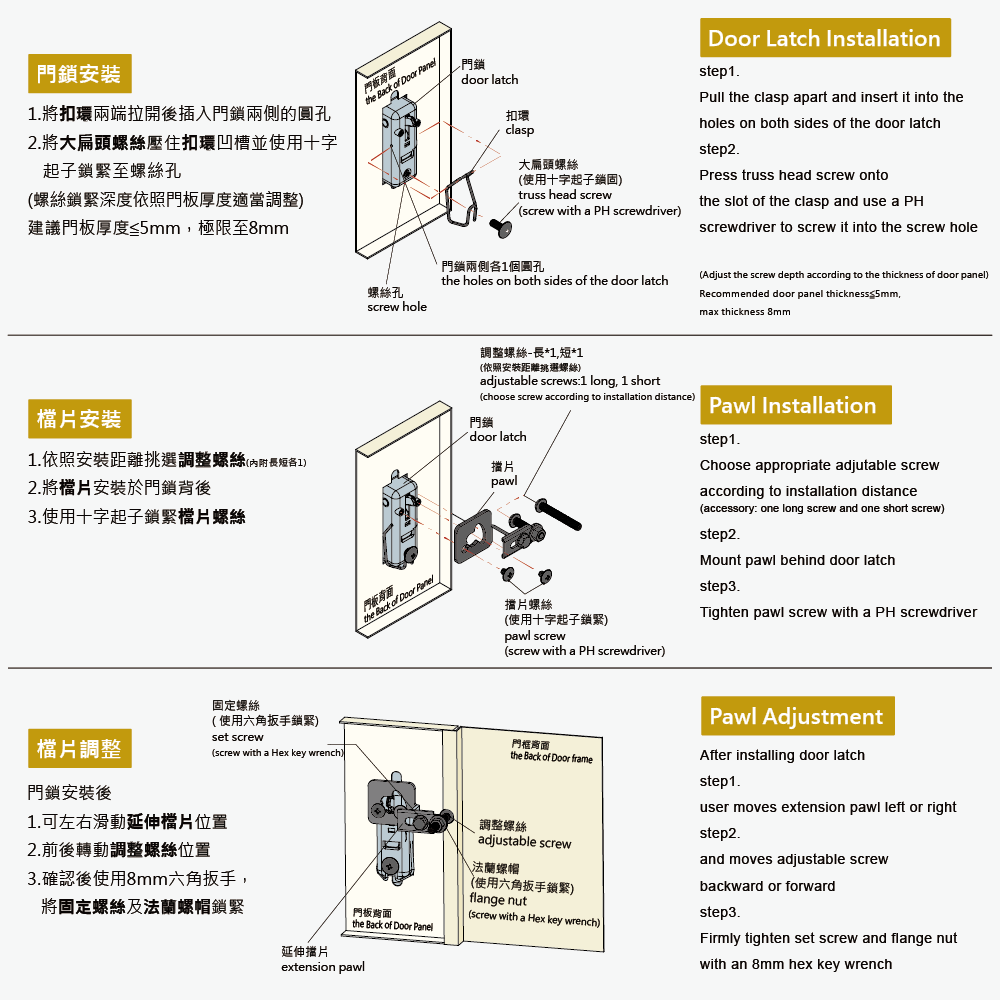
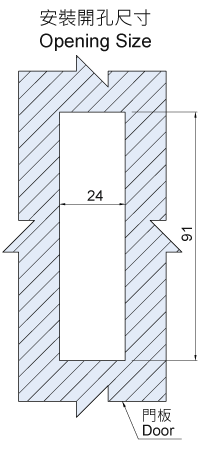
Door Latch Installation
1. Pull the clasp apart and insert it into the holes on both sides of the door latch.
2. Press truss head screw onto the slot of the clasp and use a PH screwdriver to screw it into the screw hole. (Adjust the screw depth according to the thickness of door panel)
Recommended door panel thickness≦5mm, max thickness 8mm.

Pawl Installation
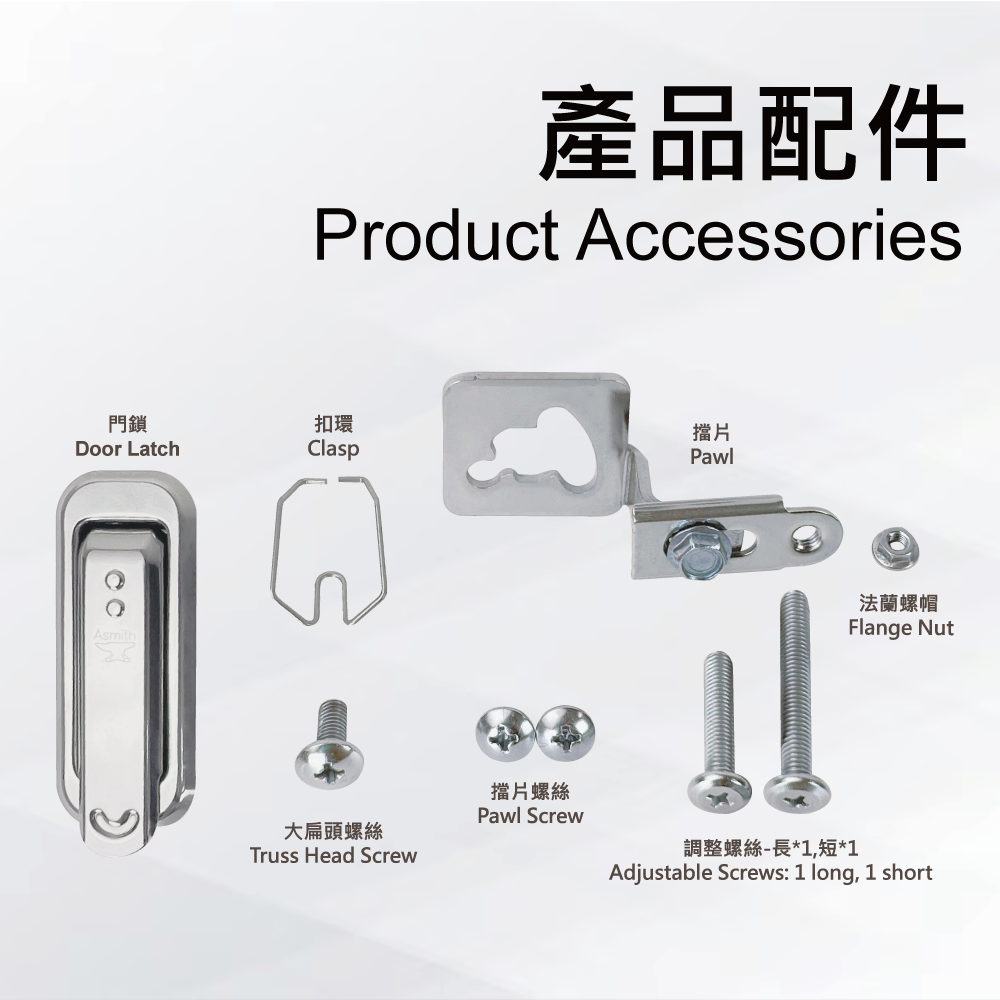
1. Choose appropriate adjusting screw according to installation distance. (accessory: one long screw and one short screw)
2. Mount pawl behind door latch.
3. Tighten pawl screw with a PH screwdriver.
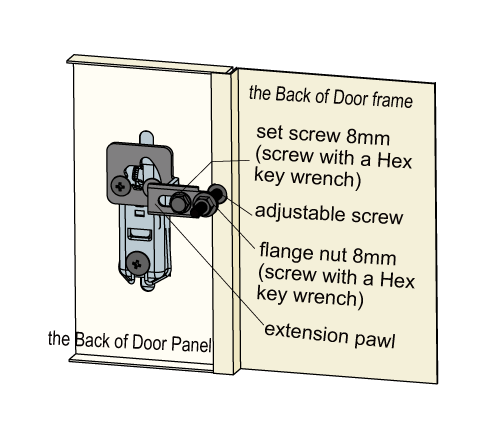
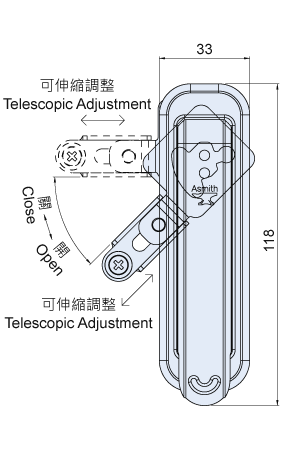
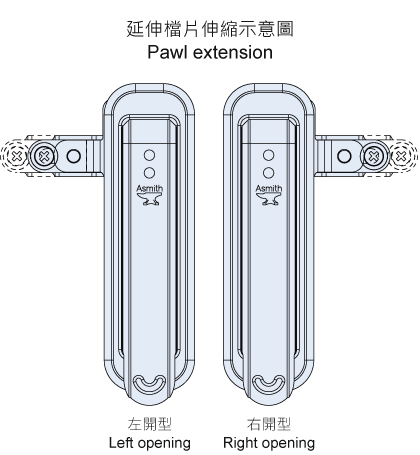
Pawl Adjustment
After installing door latch
1. User moves extension pawl left or right.
2. And moves adjusting screw backward or forward.
3. Firmly tighten set screw and flange nut with an 8mm hex key wrench.
Similar Products


